This chapter contains the following topics:
Designing Financial Statements
This chapter and the next two describe how to produce financial statements. Financial statements include such basic accounting tools as Operating Statements and Balance Sheets.
Financial statements work in three phases: layout, specification, and process.
| • | In the layout phase, you specify, line by line, which accounts are to be printed on a financial statement. You can intersperse various commands to control headings, totals, and other formatting functions. A layout, once built, is saved and may be used by more than one specification. The Financial statement layouts selection is described in the chapter you are now reading. A subsequent chapter, Build Financial Statement Layouts, provides a checklist showing how to go about crafting these layouts. |
| • | In the specification phase, you define what cost centers will appear on the report, what layout it will use, and what actuals, budgets, or comparatives will appear in the different columns. Specifications, like layouts, are saved for future use. All the phases are described in the Setting Up Statement Processing section of the Financial Statements chapter. |
| • | In the processing phase, the financial statement is built and printed. This printing phase is also described in the Financial Statements chapter in the Printing Financial Statements section. |
Standard layouts and specifications are provided with the module and may be adapted as needed.
In addition, the Make Proforma layouts and Make SAF layouts selections allow you to produce layouts and specifications automatically. This is described in the Proforma and SAF Layouts chapter.
Financial statement layouts are sets of parameters you enter to specify the part of the format in which statements print. For each layout you enter two kinds of parameters:
| • | Account numbers, to specify which accounts should be printed on that line of the statement. |
| • | Functions which put a blank line here or print a line total here, to control all aspects of the statement’s appearance. |
The Financial statement layouts selection is for users who understand Operating statements and balance sheets well. As needed, you should consult someone who is very familiar with such financial statements.
You can produce the following types of financial statements:
| • | Operating Statement |
| • | Balance Sheet |
| • | Operating Statement Supporting Schedule |
| • | Balance Sheet Supporting Schedule |
| • | Cash Flow Statement |
| • | Expanded Cash Flow Statement |
| • | Analysis of Changes in Working Capital |
| • | Statement of Changes in Financial Position |
This chapter describes the selections in the Financial statement layouts menu.
| • | An Entering Layouts section is described later in this chapter. This section does not explain all the different codes or functions that can be entered in a layout; that is done in the Entering Layouts chapter. |
| • | Copying one layout to another is described later in this chapter in the section Copying a Layout. This lets you: |
Create an additional layout by copying an existing one, possibly from a different company
Add a cost center or subaccount to an existing layout
Create an additional layout with a new cost center or subaccount.
| • | Printing an Edit List of the layout is described later in this chapter. |
| • | Printing a sample financial statement based on the layout is described later in this chapter in the Sample Statements section. |
| • | Verifying operating statement and balance sheet layouts is described later in this chapter in the Verifying Layouts section. |
| • | Resequencing Layouts is described later in this chapter. |
| • | The Texts selection appears on the Financial statement layouts menu. See the Texts chapter. |
Select
Enter from the Financial statement layouts menu.
Two screens are needed to enter layouts. The first screen appears as follows:

From this screen you can work with both new and existing layouts.
Enter the following information:
1. Layout number
Options
Enter a number to identify this layout, or use one of the options:
|
<F1> |
For the next layout |
|
<SF1> |
For the previous layout |
|
Format |
999 |
|
Example |
Type 1 |
2. Type of statement
Options
Enter a statement type from the list below.
|
Code |
Layout Type |
|
|
Operating Statement Format Layouts |
|
|
P |
Operating Statement |
|
S |
Supporting Schedule (Operating Statement format) |
|
C* |
Cash Flow Statement |
|
E |
Expanded Cash Flow Statement |
|
W* |
Analysis of Changes in Working Capital |
|
Balance Sheet Format Layouts |
||
|
B |
Balance Sheet |
|
X |
Supporting Schedule (balance sheet format) |
|
F* |
Statement of Changes in Financial Position |
|
*Codes C, F, and W represent the three standard SAF (Source and Application of Funds) layouts. You can also automatically create them from the other layouts. Refer to Making SAF Layouts section of the Proforma and SAF Layouts chapter. |
|
Format |
One letter from the list above |
|
Example |
Type S for a supporting schedule (Operating Statement format) |
3. Description
Enter a description of this statement layout.
|
Format |
2 lines of 25 characters each |
|
Example |
Type Sales schedule |
Field number to change ?
Options
Make any needed changes. For an existing layout you may also use one of the options:
|
<F1> |
For the next layout |
|
<SF1> |
For the previous layout |
|
<F3> |
To delete this layout. You can delete a layout even though an existing specification references it, so be careful. |
When you press <Enter>, the following screen displays:
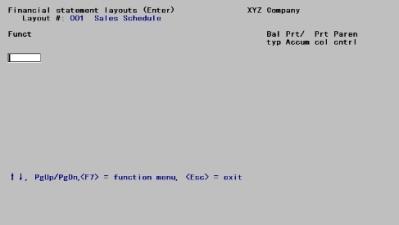
Use this screen to enter accounts and function codes which control the content and appearance of the financial statement.
This is a scrollable screen of unlimited length.
You enter one line for each account or function in the order in which you want them to appear or to be performed.
Options
You can change the order in which the lines appear or modify the content of each line by using these keys shown on the screen:
|
<Up> |
To move to the next line |
|
<Down> |
To move to the previous line |
|
<PgUp> |
To move to the next screen |
|
<PgDn> |
To move to the previous screen |
|
<F1> |
To allow insertion of a new line at the current line (moving all subsequent lines down by one line) |
|
<F2> |
To move or copy the current line. After pressing <F2>, go to the line below the location where you want the line, and press: <Enter> to move the line (deleting it from its original location), or <F1> to insert the copy, or <Esc> to cancel the move/copy |
|
<F3> |
To delete the current line |
|
<F6> |
To jump directly to an account number (enter the account number) |
|
<F7> |
To get a menu of the functions. |
|
<Esc> |
1. To exit the function when you are done entering the layout 2. To cancel a change or a move/copy function |
Each line is identified by a function code. You do not enter the code directly; instead use <F7> to bring up a menu of the available selections, thus:
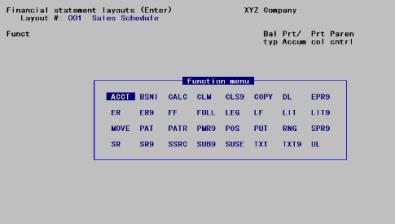
These are the only functions allowed, you can use <Up>, <Down>, <Left>, and <Right> to highlight the desired function, and then press <Enter> to use it.
Once a function has been entered, the window closes to allow data entry in the columns appropriate for that function. The format is different for each function, but the cursor only moves to the appropriate columns.
For a detailed explanation of the different functions, refer to the Entering Layouts chapter.
The Copy layouts selection enables you to copy an existing layout (including all subaccounts).
Select
Copy from the Financial statement layouts menu.
The following screen appears:
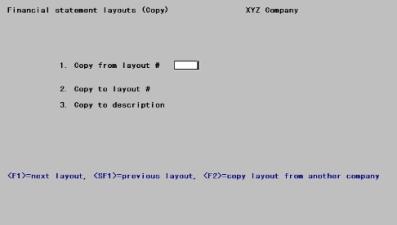
Enter the following information:
1. Copy from layout #
Options
Enter the number of the layout to be copied from, or use the option:
|
<F1> |
For the next layout |
|
<SF1> |
For the previous layout |
|
<F2> |
To copy layouts from another company. This option is only available if you have defined multiple companies and is explained in the Copying layouts from another company section below. |
Upon selection of a valid layout number, the type of statement and description display.
|
Format |
999 |
|
Example |
Press <F1> |
2. Copy to layout #
Enter the new layout number. This must not already be on file.
|
Format |
999 |
|
Example |
Type 001 |
3. Copy to description
Enter the description of the new layout.
|
Format |
Two lines of 25 characters each |
|
Example |
Type Balance Sheet |
4. Statement type
Normally you cannot change a layout’s type as you copy it, but the balance sheet (layout type B) and its supporting schedule (layout type X) are an exception. Either of these can be changed to the other.
If the copy-from layout is neither X nor Y, this field does not appear.
Enter the statement type for the new layout: B for a balance sheet, or X for a balance sheet supporting schedule. The default for this field is the same type as the copy from layout.
When the copy to layout is type X, any PATR codes encountered will be converted to PAT codes, since PATR codes are not allowed on type X layouts.
When the copy to layout is either type B or type X, the copy function checks for any ratio codes and removes them, since ratios are not allowed on balance sheets or balance sheet supporting schedules. Ratio codes are SR, SR9, SPR9, ER, ER9, and EPR9.
|
Format |
One letter, either B or X |
|
Example |
Type B |
Copying layouts from another company
When you use the <F2> option to copy a layout from another company, an alternate screen is displayed.
The following screen appears:

Enter the following information:
Copy from company
Options
Enter the company code whose layout you want to copy. This must have the same account number structure as the current company. You may use the options:
|
<F1> |
For the next company |
|
<SF1> |
For the previous company |
|
Format |
Two characters |
|
Example |
Press <F1> |
1. Copy from layout #
Options
Enter the number of the source company’s layout number, or use one of the options:
|
<F1> |
For the source company’s next layout |
|
<SF1> |
For the previous layout |
The type of statement and its description display.
|
Format |
999 |
|
Example |
Press <F1> |
2. Copy to layout #
Options
Enter the number to assign to the new layout. This must not already be on file in the new company. You may use the option:
|
<F2> |
For the next available layout number |
|
Format |
999 |
|
Example |
Press <F2> |
3. New description
Options
Enter the description for the copy to layout. This field is optional. You may use the option:
|
<F2> |
To use the same description as for the <copy from> layout |
|
Format |
Two lines of 25 characters each |
|
Example |
Press <F2> |
4. Copy text ?
Answer Y to also copy the texts used in the copy from layout; otherwise, answer N. Texts are copied by text number not by content; if a text number already exists in the Texts file of the receiving company, that text is preserved.
|
Format |
One letter, either Y or N |
|
Example |
Type N |
Field number to change ?
Make any needed changes. Press <Enter> to copy and there will be a period of processing as records are copied. The record currently being processed will display on the screen. When done, press <Esc>.
This selection prints an edit list of your layouts.
See a Financial Statement Layout Edit List example in Sample reports.
Select
Edit list from the Financial statement layouts menu.
The following screen appears:
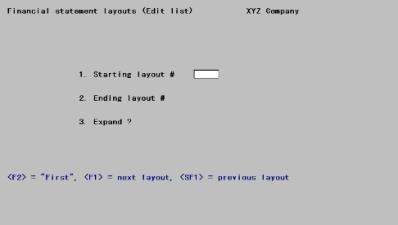
Enter the following information:
1. Starting layout # through
2. Ending layout #
Options
Enter the range of layouts to print, or use one of the options:
|
<F1> |
For the next layout on file |
|
<SF1> |
For the previous layout on file |
|
<F2> |
For the <First> starting or <Last> ending layout on file |
|
Format |
999 at each field |
|
Example |
Press <F2> at each field |
Answer W to expand the range entries and accounts containing a wild-card, so that each main-account and subaccount combination which might be included is shown.
Answer S to expand the account and range entries to show the list of specific accounts that could be included when a financial statement is specified for a cost center, a cost center group or for all cost centers. If your account number format does not use cost centers, this option is not available.
Answer N to show the entries as they are in the layout without any expanded lists.
|
Format |
One letter, either W, S, or N |
|
Example |
Type N |
4. Enter cost ctr/group
If you did not enter S in Field #3, or if your account number format does not use cost centers, this field does not appear on the screen.
Options
Otherwise, enter one of:
|
P |
Expand cost center |
|
G |
Expand cost center group |
|
A |
Expand <All> cost centers |
|
Format |
One letter from the list above |
|
Example |
Type A for <All>. |
If you answer P, you will be prompted to enter a valid cost center.
Options
At each cost center segment you may use one of the options:
|
<F1> |
For the next segment (division or department) |
|
<SF1> |
For the previous segment |
|
<F5> |
For <All> accounts |
If your cost center has two segments you may use <F5> at either segment to select all departments for a particular division or vice versa, or at both segments to select all accounts regardless of cost center. The latter is effectively the same as entering A.
|
Format |
Your standard cost center format, in one or two segments, as defined in Company information |
|
Example |
(Does not occur in this example because you have chosen A for <All>) |
Options
If you answer G, enter the group code. This must previously have been defined in Cost center groups.
You may use one of the options:
|
<F1> |
For the next group |
|
<SF1> |
For the previous group |
|
Format |
Eight characters |
|
Example |
(Does not occur in this example because you have chosen A for <All>) |
If you answer A, all accounts are selected without regard to cost center.
Field number to change ?
Make any needed changes. Press <Enter> when done to print the list.
This selection is used to print a sample financial statement from a layout so that you can see how the final statement will look.
The sample statement will look like the financial statement, with these exceptions:
| • | On the sample statement, two lines will be printed at the top of the page to describe the statement |
| • | On the sample statement, all amounts will be printed as 999,999,999.99. |
| • | Account and PAT layout lines that print on this sample statement will not appear on the actual statement if their amounts are zero. |
| • | For the Statement of Changes in Financial Position, the sources and uses of cash will be printed twice, once for sources and once for uses on the sample statement. On the actual financial statement, each account will print only once, as either a source or a use. |
If an account number used in the layout is no longer in the Chart of Accounts File, the description that prints on the actual financial statement will be Account (account number) not on file.
Select
Sample statements from the Financial statement layouts menu.
The following screen appears:
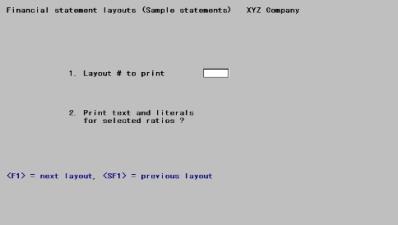
Enter the following information:
1. Layout # to print
Options
Enter the number of the layout to print, or use one of the options:
|
<F1> |
For the next layout on file |
|
<SF1> |
For the previous layout on file |
|
Format |
999 |
|
Example |
Type 3 |
2. Print text and literals for selected ratios?
Answer Y to print the texts and literals associated with the selected ratios you enter next, or N to not do so.
|
Format |
One letter, either Y or N. The default is N. |
|
Example |
Press <Enter> for N |
If you answer Y, you may enter up to nine selected ratios for which to print texts and literals. In the first subfield, you may also use the option:
|
<F5> |
To print texts and literals for <All> selected ratios (equivalent to entering 1 through 9 individually) |
|
Format |
Up to nine single digits, each in a separate subfield; the first blank terminates data entry. |
|
Example |
Does not appear in this example because you entered N at the preceding. |
Field number to change ?
Make any needed changes. Press <Enter> to print the sample.
Verify layouts checks to ensure that the following are all true about a balance sheet or operating statement layout:
| • | Each account has the correct type for the layout. If an operating statement account appears on a balance layout, you will be notified. If a balance sheet account appears on an operating statement layout, you will be notified. |
| • | Every operating statement account in the Chart of Accounts is included in the accounts specified by an operating statement layout. |
| • | Every balance sheet account in the Chart of Accounts is included in the accounts specified by a balance sheet layout. |
| • | One BSNI (Balance Sheet Net Income) is on a balance sheet layout. |
| • | Each account specified on a layout is specified only once. |
There are situations in which a balance sheet account should appear on an operating statement or in which an account should appear more than once at different places on a layout, so some exceptions found by this program may not be mistakes. For a discussion of beginning and ending periodic inventory on operating statements, see the Handling Periodic Inventory appendix.
The primary intention of this program is to help discover two types of problems that can keep your statements from tying out:
| • | If accounts are added to the Chart of Accounts without being added to the proper layout, the totals will not reflect them. |
| • | If an account is specified in more than one place on a layout, the totals may be over-stated or under-stated by the amount of the duplication. |
A secondary purpose of this program is to assist in correcting the layouts if you have occasion to restructure your accounts. This is mostly an upgrade issue discussed in the System Manager User documentation. Restructuring can make duplications occur in your operating statement or balance sheet layout which you would normally like to have removed. There is an option in this program to remove duplications that occur in sequential lines of the operating statement and balance sheet layouts. Because this type of error may appear in many lines at the same time, there is also an option to suppress these corrections from the report.
Select
Verify layouts from the Financial statement layouts menu.
The following screen appears:
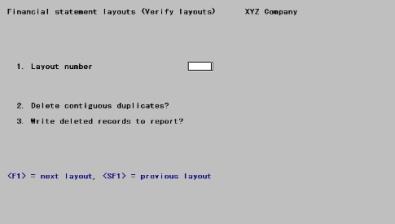
Enter the following information:
1. Layout number
Options
Enter the number of the layout to be verified. Only operating statement or balance sheet layouts qualify. You may also use one of the following options:
|
<F1> |
For the next qualifying layout number |
|
<SF1> |
For the previous layout |
|
Format |
999 |
|
Example |
Press <F1> |
2. Delete contiguous duplicates?
Answer Y to have the program automatically delete duplicate account specifications that appear on sequential lines of the layout.
Answer N to report but not delete all duplicates found.
|
Format |
One letter, either Y or N |
|
Example |
Type N |
3. Write deleted records to report?
If the program is not to delete contiguous duplicates, the question displays as (Not applicable).
Otherwise, answer Y to list the deleted records on the Verify Layout Report with the caption Contiguous duplicate deleted, or N to suppress these entries from the list completely. It is suggested that you use this option only when you have a backup copy available.
|
Format |
One letter, either Y or N |
|
Example |
(skipped because the previous field is N) |
Field number to change ?
Make any needed changes. Press <Enter> to verify the layout.
If errors are found, you are notified on the screen and a Layout Verification Report is printed.
An internal numbering system is used in the computer to keep the layout lines in sequence. If many changes are made to a layout, you may get a message (while editing the layout) stating that the layout must be resequenced. It is highly unlikely that this will ever occur during your use of PBS software, but should it occur, use this selection to resequence the layout. Once done, you may continue editing the layout.
Select
Resequence layouts from the Financial statement layouts menu.
The following screen appears:
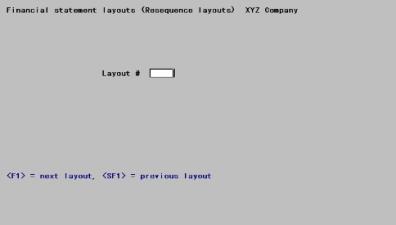
Enter the following information:
Layout #
Options
Enter the number of the layout to be resequenced, or use one of the options:
|
<F1> |
For the next layout |
|
<SF1> |
For the previous layout |
|
Format |
999 |
|
Example |
Press <F1> |
Field number to change ?
Make any needed changes. Press <Enter> and the resequencing begins. Upon completion, you are informed of the number of lines that were read and written.